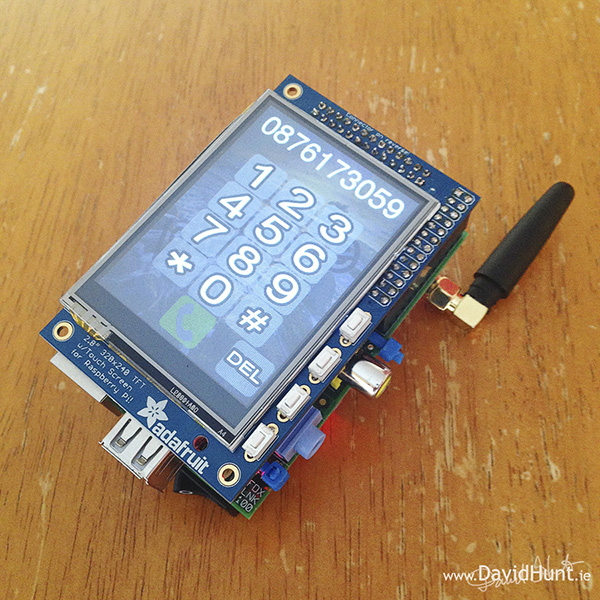
The latest Raspberry Pi is an amazing Chip, a whole computer in its own that can run Windows 10 very efficiently. While our indigenous smartphone isn’t quite that advanced, it is a good way to have a better understanding of it and make a cool gadget to show off your classmates. The phone has a Adafruit Touchscreen, a numeric keypad on the screen for basic functions, a LiPro battery that fit nicely behind the TFT screen, and a sim900 GSM module for connectivity. The touchscreen interface was completely developed by this DIY enthusiast and you can easily make a call or receive it. Not much complexity here, but you can make it as advanced as you can. While there are is no Wi-Fi or other luxuries, this phone essentially is a stepping stone for your future endeavors on this small, yet powerful chip. So here is how you can make your very own smartphone from a Raspberry Pi:
Here is the phone in action:
The basic components have been mentioned before, but just to recap, we have a Sim900 GSM/GPRS module for standard AT calls, text messages and so on. At the bottom of the PCB, you can see a SIM card that allows you to operate your phone on any SIM card available in the market. Even below the SIM card, you can see the on-off switch and the DC-DC converter that converts 3.7 volts of the battery to 5 volts for everything else. The LiPro battery is somewhat hidden in this whole thing between the screen and the chipboard. The only problem he faced was with the heat as the raspberry Pi CPU tends to get heated up in operation so he bought a small fan and it sort of circulated the air around the phone’s insides that had no circulation at all. The GSM card along with some other things stick out a bit and it doesn’t look pretty. A small bit of foam also came in handy to separate the GSM module and the Raspberry Pi. Lastly, good old cords were used to bind the phone together.
The whole smartphone can be made in just 158 . It is a little expensive for a probably useless project that you won’t use once the excitement wears off, but you can salvage it for parts anytime of the day and use them in other projects. Most of it is reusable in other similar Raspberry Pi projects and so on. The software code is available on GitHub and you can also find links on how to install the PiTFT screen. There are no circuits needed.
I hope you enjoyed this build!


