
Taking selfies and photos using your phone is the “big thing” today. Everyone is getting the hang of taking “amazing” photos using their mobile phones, simply because it is so convenient to do so! Simply take out your phone, a few clicks and voila, you too are a photographer!
Although many people think like this, but as professional photographers know it takes a lot more effort and skill to actually be called a professional. Anyhow, it does not mean you should stop your hobby turned passion just because you don’t have a DSLR or a professional certification. Today wonderful engineering will tell you some tips that you can use to take incredible photos by simply keep using your iPhone or android!
If you have just started using mobile photography, you must master these 12 techniques to really stand out of the crowd. Even if you think you are an accomplished phone photographer, you might find some of these techniques very handy!
1. Clean The Lens
Your phone is your pocket or a bag for most of the time. And if it’s not then it is most probably in your hands. So at all times it is exposed to dust and other contaminants in the environment. Hence the camera is bound to get dirty, and a dirty camera lens will have a significant negative effect on the quality of your photos.
There is no way you can take a great photo if your lens is dirty. It will block out the light from reaching your camera’s sensor and will result in blurs or dust spots on your images.
Always use a soft lens cloth before any photography session, and make sure you are not using any abrasive cleaners. Else these cleaners will leave scratch marks on the glass lens, resulting in even poorer image quality.

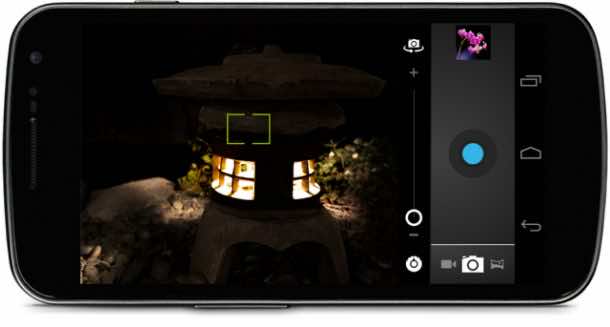
2. Focus on the “Focus”
Making sure that your object or person etc. for the photo is in sharp focus. You can simply tap the screen on your iPhone and some androids in order to focus on the thing where your subject lies. A small yellow square will pop up and help you focus your picture for a crystal clarity.
In case your subject is mobile, tap the screen just before taking the shot in order to make sure that your subject is at least in focus.
You can draw more attention to them if the need arises by using one of the editing software and blurring out the surroundings.
3. Adjust Exposure
Many phones will usually auto set the exposure of your camera, but usually results in a bad photo. Exposure means how bright or dark your image will be, and using auto exposure is usually not the best option. For example, if your subject is located in the dark area, this would make the overall image too bright, or vice versa.
Instead, use manual exposure tools by going into the settings of your camera. After setting the exposure take the picture, it will surely look better than those super white or ultra dark pictures your friends keep on uploading!
4. Watch the Zoom buddy!
Although we sometime like to take our pictures from even closer, you might have noticed the drop in quality once you use the zoom option on your phone. This is because your phone digitally zooms the phone, rather than optically zooming in. And in this process, the image is being cropped out.
So if you need to take a photo of a far away object, DON’T use the zoom option. Instead, try to move closer to your subject. And if that is not possible than just take the photo and crop it using a software. That will save you some pixels in quality, and will give you more control over how much of the photo you want to crop out.
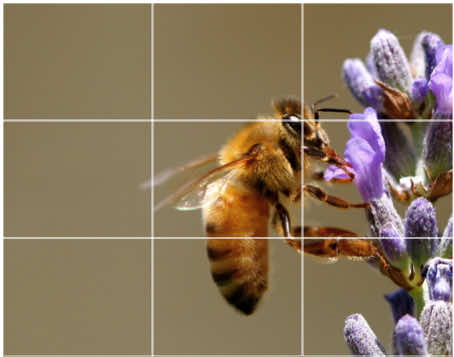
5. The Golden Rule Of Thirds
The rule of thirds is one of the most useful composition techniques in photography, and as all photographers know picture composition is one of the most important aspect in a picture.
The rule of thirds consists of mentally dividing your image using two horizontal and two vertical lines, as shown in the picture below. You then try to position the important parts of your picture along those lines or at the points where they meet.
You should always try to put your subject of photo in line with the vertical lines. And align the horizon (if any) with one of the horizontal lines. This logic behind the rule of thirds is that the off-centre composition makes a more interesting and intriguing shot.
For we would recommend to leave the grid on. This will help you train your eye, for the future. Of course in some situations, this rule can be broken, and we as in all forms of arts breaking the rules usually leads to something beautiful!
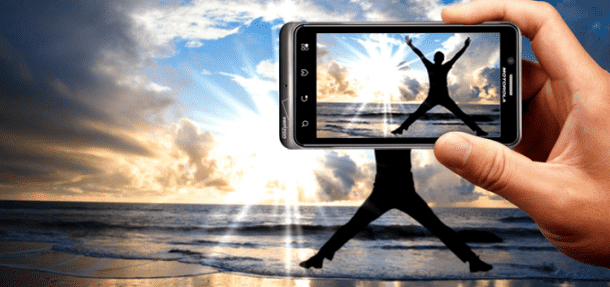
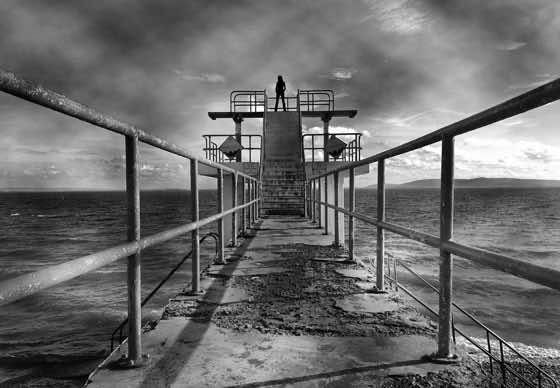
6. Use Leading Lines
Leading lines is another handy compositional tool. Using leading lines can make the viewer focus on the main subject at first and then lead the deeper into the image. It simply involves using vertical, horizontal or converging lines in order to focus the viewer’s attention on a certain thing in your image.
In the below photo, the leading lines of the railings leads the viewer’s eyes to the stairs. And the stairs eventually lead to the silhouette standing on the ramp.
7. Shoot From Different Perspectives
Using a phone instead of a heavy camera set means that it is a lot more handy and easier to carry. Thus you can experiment with different perspectives. Maybe getting low and shooting from ground level will give an interesting view that usually is not visible in the real world. Or as in the picture below, shooting from above cover all aspects of an apartment in Hong Kong, while giving a unique and refreshing perspective.
Bottom line, experiment with multiple perspectives until you get it right. That’s the advantage with digital photography, you can get so much while spending so little.

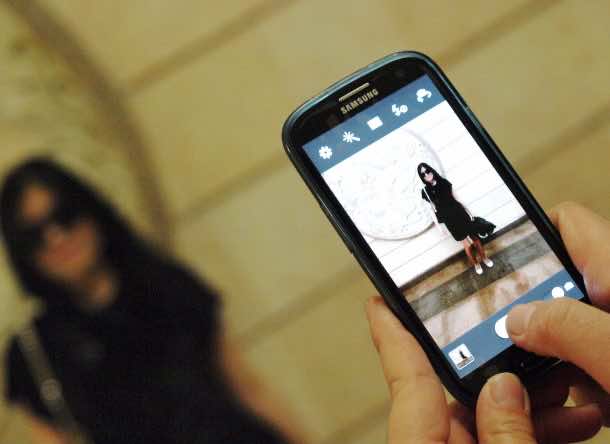
8. Watch Out For Distracting Backgrounds
If you think your photo has a distracting or cluttered background, it might take the viewer’s attention away from your key subject. The best bet is to convert your photo into black and white, in order to keep the distracting objects and colors away like in the photo below. By eliminating all the colors, the distraction is removed.
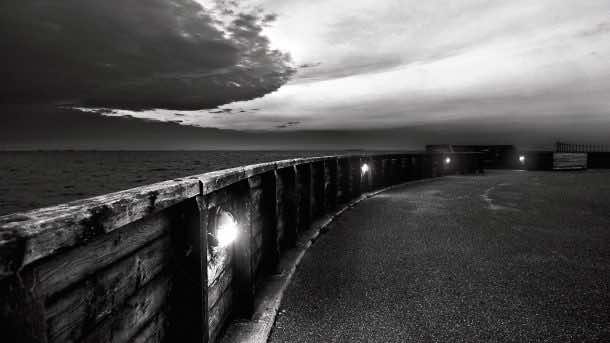
Ofcourse the logical solution is to avoid cluttered backgrounds altogether. Like in the picture below, getting down low and using the sky as the backdrop made the subject stand out as there was no clutter. Also, this photo is a great example of the concept of rule of thirds and leading lines discussed above.

9. Use Panorama Mode
There are multiple scenarios where a single shot with your camera won’t do justice to the scenery around you. This is the reason the Panorama mode was introduced in cameras. For example, if you want to take a shot of beautiful skyline, or a mesmerizing landscape, or an astonishing beach like in the photo below – you might want to use the Panorama mode.

For using this mode, simply hold your camera in the portrait orientation while starting from the left-hand side of the scene. Now press the shutter button and move the camera slowly to the right in order to capture a sharp image of the full scene. When you reach the end just re-press the shutter button to stop.
Another thing to remember, when panning across the scene try to keep the point of the arrow on the yellow line, and tilt the camera as soon as the arrow moves off the line. Panning slowly and steadily will get you a better image.
We hope you benefited from these tips and techniques, and improved your photography skills.
Have anything more to add to this article? Comment below!
