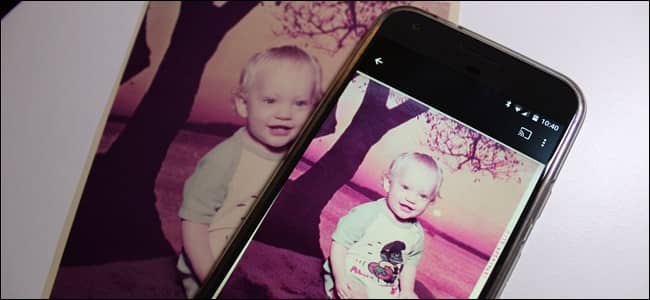
Gone are the days when people came over to your place and you would bring out the old album that weighs a ton. Now the photo sharing experience lies at the heart of all the social networking websites. In order to share our old photos, we would have to scan the old photos with a scanner or in the case of my not-so-tech-savvy-sister, capture the image of the picture from a camera phone, the picture would come out wavy and with a flash on the screen. The fading process that old pictures go through, is all the more reason to digitize them and to have them saved for a long time. Wouldn’t it be so much nice if there was an easier way to do digitize hard copies of photos? And get all the likes on your cute childhood. We have just the thing to help you digitize the photo directly from your phone.
Google came up the app available for both Android and iOS, called PhotoScan which allows you to scan your old photos without the hassle and with remarkably good results. Follow the steps below to experience the digital photo experience.
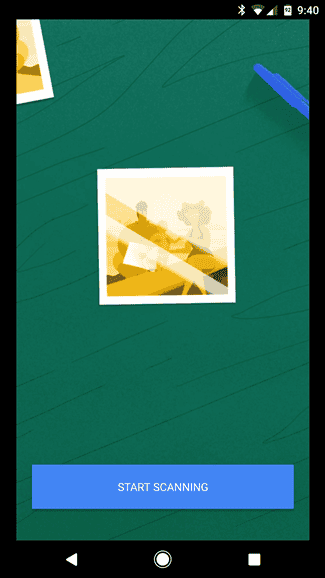
After you have downloaded and installed PhotoScan app on your device, here is the simple step to overview how the app works.
1. When the app starts, press > START SCANNING button.
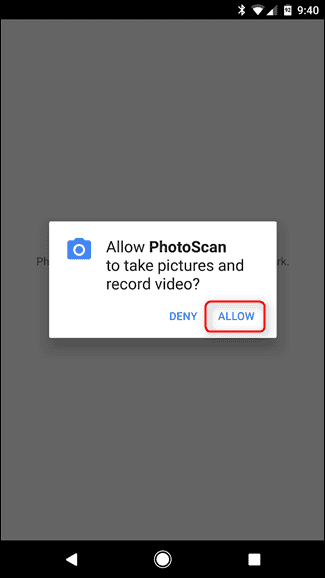
2. The app will ask your permission to access the camera on your device, > Allow to permit. The app will start the Camera interface as a tool for scanning.
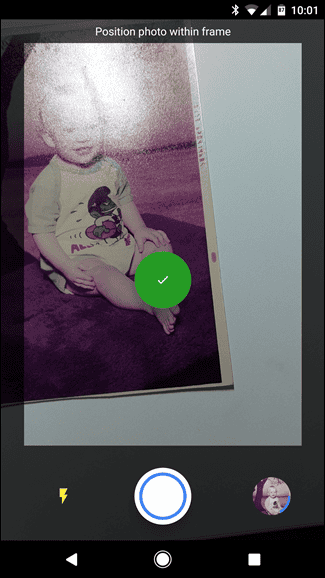
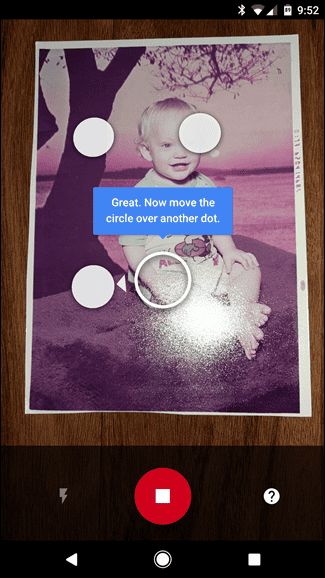
3. Once you have grabbed the picture you want to digitize, aim the camera on the photo and tap the >Shutter button. The picture you just took will appear with four dots on each corner of the picture on your screen.
4. Drag the center circle to any one of those dots and the app will start to scan the photo. Repeat the process for the other three remaining dots, in an orderly fashion.
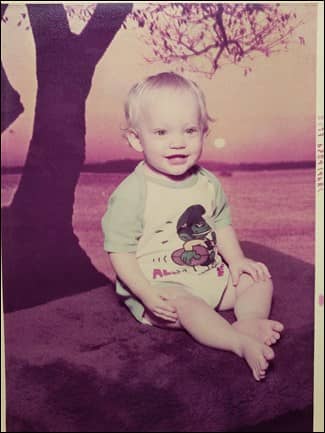
5. The app has now taken a clean scan of your beloved photo without reflecting flash glare on your screen or crummy edges. You can go ahead and save the picture into your digital gallery right there on your device.
Simple and hassle-free way to get superb quality digital photos from the past ready to blast your social media with likes and comments.

With the prevalence of printer/scanner combinations, this seems like an answer to a problem that doesn’t exist. My printer scanner will do a far better job. I can open it with my basic photo editing app and make most necessary adjustments before transferring it to my phone with a USB cable. I even have a nice photo editing app on my phone if I need it. I generally reduce the size of the photo that O intend to keep on my phone. Storage space, even with a 64 GB SD card is valuable. I can keep a larger size on my desktop for longer term storage.