
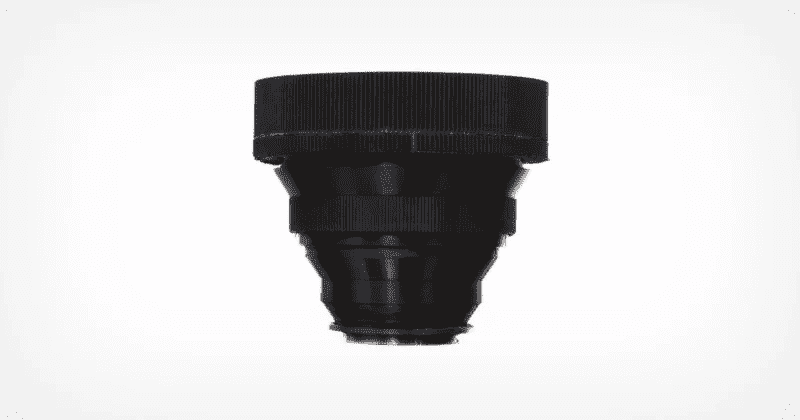
Photographer Felix Steele has developed a 3D-printed 164mm f/2.5 lens that has no fasteners or screws. It is also more economical than regular lenses.
According to Peta Pixel, the lens that he has come up with is less than $15 using affordable glass. Steele also named his first major project “Pixels and Prisms.”
The Pixels and Prisms lens has a focusing mechanism and a fully adjustable aperture. Contrarily, other 3D-printed lenses house elements in fixed tubes without adding functionality, the official website reads.
“Every photographer has different needs when it comes to lenses — in price, speed, and focal length. The Pixels and Prisms 163mm f/2.5 telephoto lens is a customizable optical system that offers a low-cost, open-source alternative to commercial lenses through 3D printing,” Steele explains.
“As a photographer, the experience of building this lens was a valuable method of connecting with the principles which underlie much of my work. When a change in lens design affects your depth of field or sharpness, you develop an acute understanding of, and appreciation for, the equipment and techniques that you employ,” he adds.
The 3D-printed lenses include a manual focusing mechanism that can lock in fully extended or fully-retracted positions as normal lenses do.
“For under $15, Pixels and Prisms is a viable low-weight lens option for travel, portrait, or street photographers, as well as a cost-effective entry point into telephoto photography. The aperture and zoom system can even be modified to work with any lens element, so long as an extender is added to the front of the optic,” he continues.
The whole process took him 3 months. He started with an optical formula.
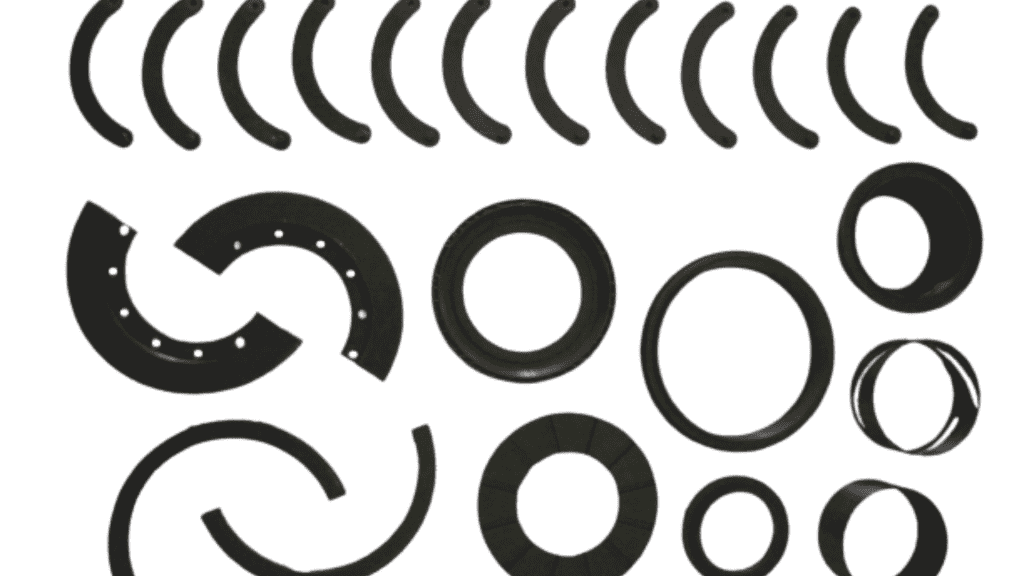
“First, balance the lens upright (on its edge) on a table or desk. Then, position a light source on the other side of the room, and direct it towards the lens element. The lens will focus the light at some point above your surface. The exact point is easily located by moving a sheet of paper to and from the lens: a halo will appear that drifts in and out of focus as you move the paper. Finally, mark the point of the sharpest focus and measure the distance from the lens element. This is your focal length (although I would recommend double-checking your calculation),” Felix Steele explains the working principle of the lenses.
“The result is a measurement that can be used to create a simple lens casing, to test image clarity and focus before moving on to the finished project. Shift your lens into focus in front of your camera until you are satisfied with the quality of your element. Alternatively, slide your lens element along a tube of cardboard. Any part that will allow you to test the performance of your lens by making adjustments in distance to the sensor should work here. Once you’re satisfied that you have an acceptable lens, set it aside and begin 3D-printing.”
