Every engineer must know how to read engineering drawings and the most integral part of this is knowing the difference between first and third angle projection. A collection of 2D drawings can be used to represent a 3D object in orthographic projection and consists of six orthographic views (Top, Bottom, Right, Left, Front and Back view) also known as six principle views. Out of these six, front, right side and top view are the most commonly used ones.
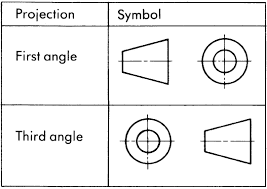
But how do you get these orthographic views from a 3D object? We essentially have two main types of projection techniques, the First angle projection, and the Third angle projection. Both of them do the same job, but there are differences in the way we get the results.
Method of Projection
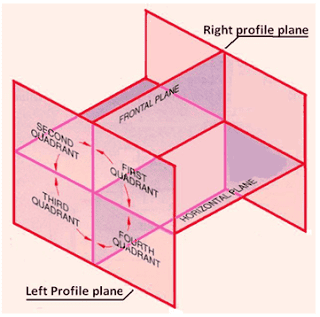
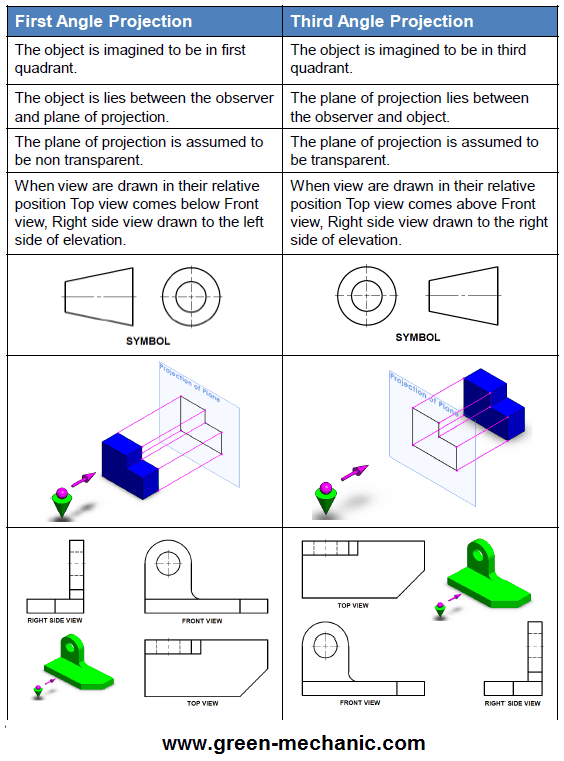
Divide the plane into four quadrants. For the first angle projection, place the object in the first quadrant and in the third quadrant for the third angle projection.
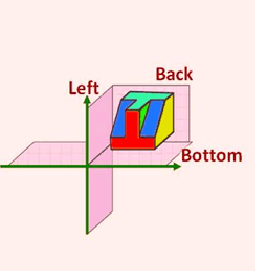
Object Placement
The object is placed between the plane of projection and observer for the first angle projection and between the object and observer for the third angle projection.
State of Projection Plane
The plane of projection is taken solid in the first angle of projection while transparent in the third.
Views Sequence
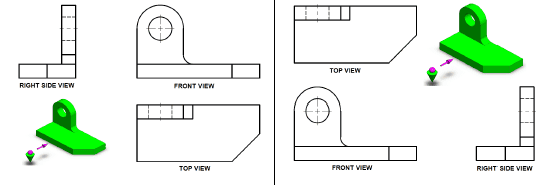
The views come like this in the first angle projection starting from top left, clockwise, Right view, Front view, and Top view. In the third angle projection right view is on right side of front view with the top view sitting at the top of the front view.
Here’s an infographic further detailing the concept


thank you. awesome information